How to Configure the Wiring Mode for the Acuvim II & AXM-WEB2 Meter
Proper energy meter configuration is essential to maximizing data accuracy and overall project success. At Accuenergy, we are committed to helping you set up your Acuvim II + AXM-WEB2 as quickly as possible so we’ve created a How To Video Series where we break down the setup process into easy-to-follow sections. Our short walkthroughs will teach you to efficiently navigate our web interface and get the most out of your metering devices.
Acuvim II + AXM-WEB2: How to Configure the Wiring Mode Using the Web Interface
The Acuvim II meter can be used on both Delta and Wye service types (single or three-phase), however the meter must be configured for the correct system type so that it can accurately measure and display metered values. Selecting the proper wiring configuration can be easily accomplished through the web interface.
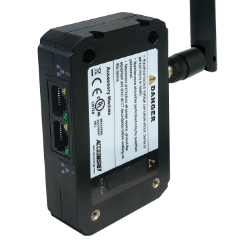
To complete these steps, you will need an Acuvim II meter with the AXM-WEB2 module powered up and connected to an internal network or the Internet plus the IP address of the device.
Step 1
Enter the IP address of the AXM-WEB2 module in your web browser. This will take you to the Accuenergy Login screen which prompts you for an Access Level and Password. Select “Admin” for the Access Level and enter the case-sensitive password for your module (default password: admin). Click the "Sign In" button.
Step 2
Upon logging in, you will be taken to the Dashboard screen. Click the " Settings" menu in the upper right corner. This will open the "Meter" tab.
Step 3
Under the General information for your device, locate the "Wiring" section which displays active settings for "Voltage Wiring" and "Current Wiring." It is critical that these settings be configured properly so that the meter can take accurate measurements. To see a list of Acuvim II wiring diagrams, visit www.accuenergy.com/wiring/.
Step 4
Click the "Voltage Wiring" and "Current Wiring" dropdown menus to select the configuration that matches your system.
Step 5
Once the Wiring settings are correct, click the green "Save" button. For the settings to take effect, the module must be rebooted. You will be prompted to either “Reboot Now” or "Reboot Later." If "Reboot Later" is selected, the module must be rebooted from the "Management" page.
Step 6
If "Reboot Now" is selected, the module will begin the reboot process right away. Click the “OK” button to log out from the web interface.
Step 7
The reboot process takes 1-2 minutes. Once the process is complete, you may log back in again to confirm the settings have taken effect. Follow the same login process outlined in Step 1, then click " Settings" to review the device settings under the “Meter” tab.
Step 8
After the settings are confirmed, you may log out again. This completes the wiring configuration process.
For more information on configuring the Acuvim II + AXM-WEB2 module, visit our Video Guide page or Contact Us.